Showing posts with label DIY. Show all posts

Sunday, July 15, 2012

DIY | Barnwood Headboard

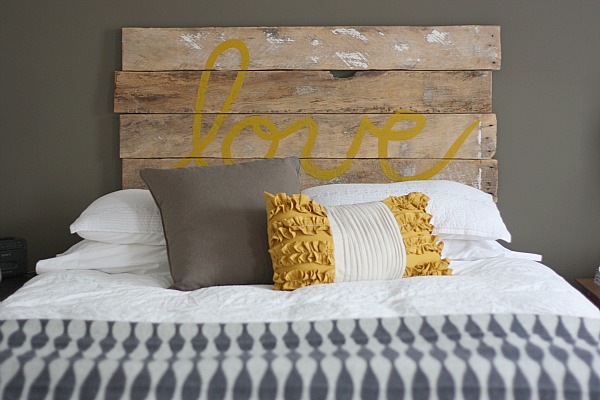
A few weekends ago, my wonderful husband made a headboard for our guest bedroom re-design! It turned out INCREDIBLE!!! I'm sorry it has taken me so long to get a how-to post up, but better late than never right!

So this project was pretty much FREE!!!! And I LOVE free! Especially when I had to do this re-design on a VERY VERY tight budget. 

For the wood, I put the word out on Facebook that I was looking for some old barnwood. I had one friend from high school that told me she had some we could HAVE.  Just come and get it and it would be ours!!! How awesome is that!?!?!  Her husband's grandfather had torn down a barn and they had a bunch left.  So we loaded up and headed to their house to get the wood.  Thank you Emily!!!

The yellow paint we used was some that I had left over from a table I painted in our bedroom.  And we already had the nails. 

So.. here ya go!!

 
First, we washed all the boards and let them dry.  To get all the dirt, spiders, etc etc off of them.


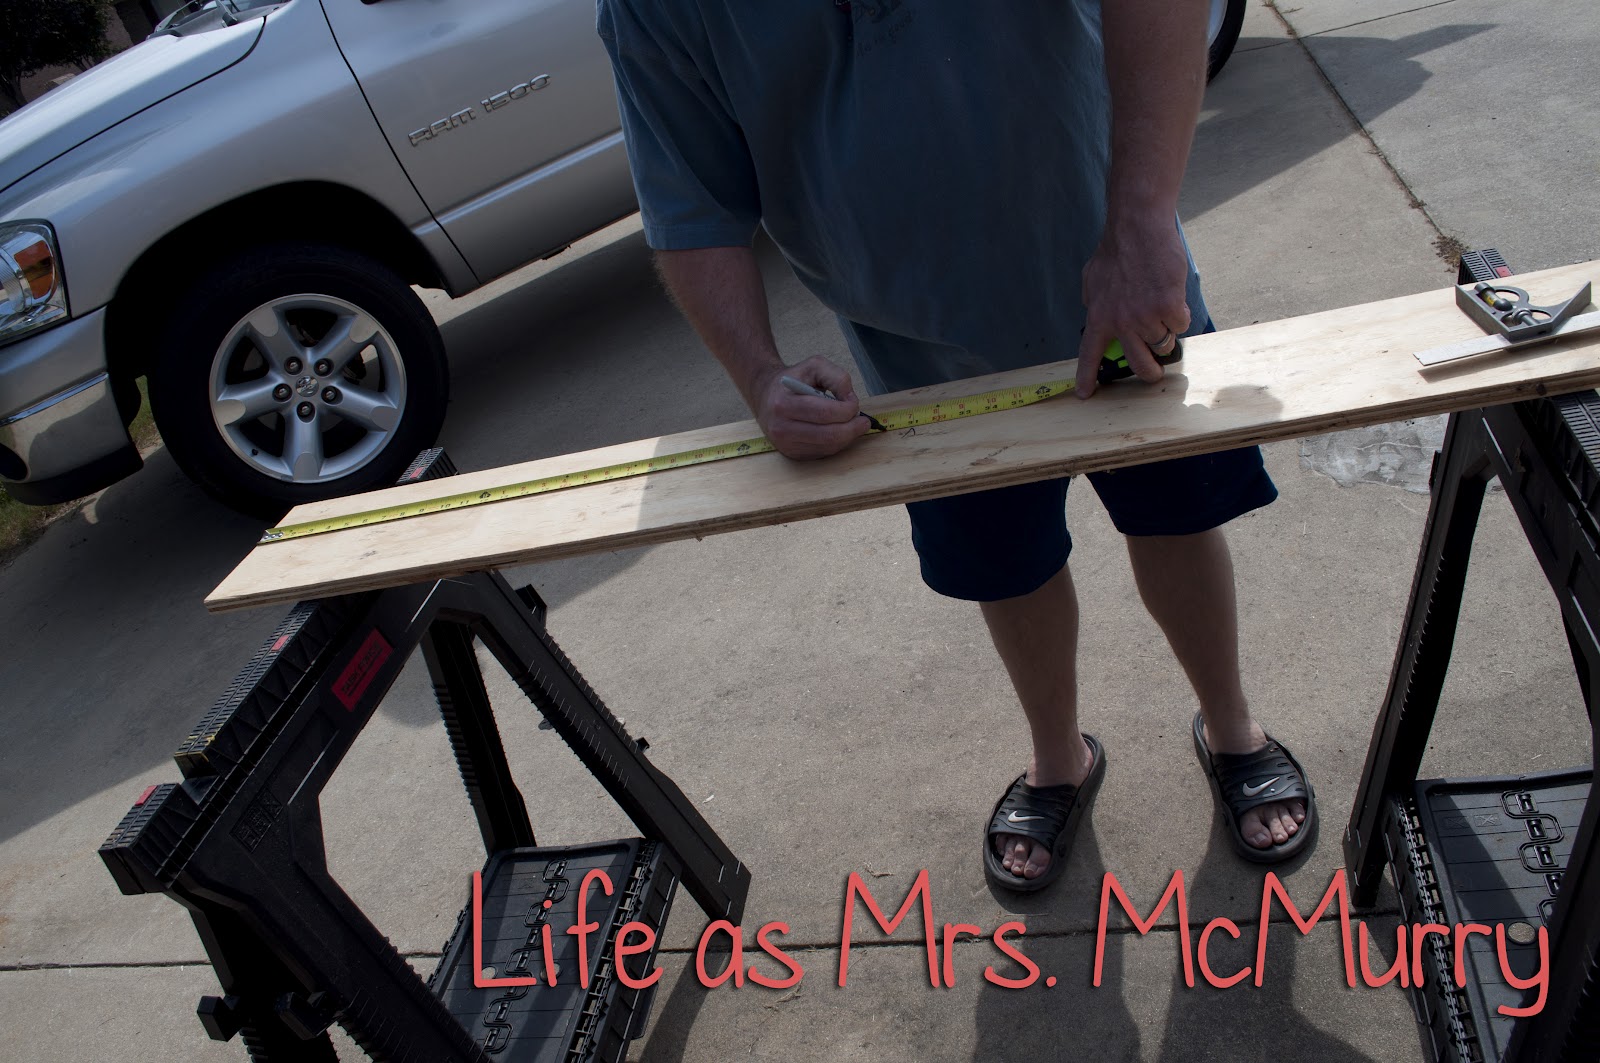
Then, the hubby measured out these boards for the backing. 


And attached them to the wall.


Then for each of the board, we measured the same length, and the cut them.  Then we staggered them and nailed them into the backing boards.


When it came to drawing/painting the "love" on the boards, I first drew it out with chalk and then went over it, very slowly with paint.  Its amazing how hard old barnwood is to paint.  I am so glad I drew it on with chalk first!


And finally, here is the finished product!!!!!


I LOVE LOVE LOVE it!!! It turned out just perfect!!

I have since painted the two brown metal pieces hanging over the nightstand the same red that is in the bedding.  They look awesome now. 

Stay tuned for a post on the finished guest bedroom re-do.  I just need to get a rug and I'll be totally done!!

Thanks for checking out the blog and I hope this helped!! If you decide to make an old barnwood headboard for yourself, please let me see pictures =)

Until next time.....


Friday, May 18, 2012

DIY To-Do List

I have so much DIY I want to do and SO LITTLE TIME... I have GOT to tackle some projects soon.  Specifically painting the chest and book shelf for the guest bedroom.

I am having a yard sale tomorrow.. so I think once that is over I'm going to head over to Sherwin Williams and buy the paint I need.  Then sand and prime those babies!

Here's my to-do list.. I probably left something off, but I think I have PLENTY of projects in my future. 

(ps, I FINALLY found bedding for the guest bedroom that you are going to LOVE!  Hopefully I can buy it after my yard sale tomorrow!!)


do you have any upcoming DIY projects you are working on?? Lets hear about them!! 

Monday, May 7, 2012

Guest Bedroom Inspiration

I am so excited about my guest bedroom redo.  I recently sold ALL of our guest bedroom furniture (Yes, I know, I'm a little crazy).  It was old (to me) and I was ready for something new.  So I have begun the process of converting our computer/junk room to a study/guest bedroom.  I cannot WAIT to get it finished!!!

I have already bought a computer desk and chair for one corner.  Here a picture of it: 
(we switched the sides though, so the computer/keyboard is actually on the left)

So yep... that is pretty much ALL I have done so far.  But I do have colors picked out and I'm ready to get to work.  Here is my color palete that I am using:


I LOVE the coral and blue together! SO PRETTY!!!!!

My friend over at Vintage Charm and Restoration found this beauty this weekend and I snagged it up from her!! She is going to paint the main part white, and I'm still deciding on a color for the drawers, either coral or blue.  I am going to be using it for a TV stand.  I cannot WAIT to see the finished product!!!


Next, the bed.  I am going to buy some bed rails and make my own headboard (with the help of my hubby of course!)  I still haven't found bedding that I want, it will probably be the last thing I buy.


I also have a chest and a bookshelf that we purchased at Target a while back.  My plan is to paint both of these (I have no idea what color yet). 

I am going to get wire baskets for the top shelf of this bookshelf to put my craft supplies in.  I love this idea from The House of Smiths.

Well, I think that is about it for my inspiration board for my guest bedroom!! I can't wait for you all to see the finished product!!! 


Saturday, April 28, 2012

A little weekend DIY.... Bathroom Cabinet Style!

So we have this cabinet in our bathroom.... its white, its big, its kinda ugly... but its built into the wall and it is big enough to hold all my junk. Yep I said it, my junk.. my hair products, body lotions I've collected through the years, make up I'm not really using...that sort of thing. You know stuff I need! But it does keep all our towels and washcloths too, so I figure it needs to stay.  But something had to be done. 

So what did I do?? I headed out and bought some pretty yellow paint.   I then came home and (with the help of my wonderful hubby) took all the doors off and sanded everything really really well.  Then I painted everything yellow!! After letting everything dry overnight we added the antique glaze that we also used on our kitchen pantry door here.  Then let everything dry, put the cabinets back on and whalah! A new cabinet for our bathroom!!

Here's a before and after picture for ya!  Sorry I dont have pictures of the process, I took photos the entire time and my crazy self deleted them!! UGH!!! Next DIY project will have photos FOR SURE!!!

I want to add somthing to the side.. not sure yet though.  Maybe some photo frames, or maybe "His" and "Hers" signs... I'll keep you posted on that one!
I have a HUGE list of projects that I am working on... including the remodel of this bathroom and getting rid of this UGLY green tile!! Stay tuneds for more DIY projects from me and the hubs!! =)

Until then.....

Tuesday, January 17, 2012

a little weekend DIY....

So I have really gotten into DIY lately... THANK YOU PINTEREST! haha! I have painted/distressed a table for my bedroom and now I feel like a pro! haha! NOT! But I did find a great tecnique to antique my kitchen cabinets.  I decided that the hubby and I would take on this project.  But I wanted to test it out first.  I saw a post on pinterest where someone had painted their pantry door an accent color.  Thus, my inspiration for this project!!

This was the door before... plain ole' boring!


So... took the door off the hindges, cleaned it with a magic eraser, took the knob and hardware off and dryed it really good.  Then I painted it with 2 coats of green paint (my kitchen colors are black and lime green).


After this dryed for a few hours, we began the process of "antiquing" it.  I picked up a bottle of antique glaze at Lowes when I picked out my paint color along with some cleaning rags.  Here is what you do with the glaze:

1.  Brush on really fast, in any direction that you want, you have about 3 or 4 minutes to work with this product.

2.  Take your cloth and begin wiping the glaze off.  You want to wipe in the same direction.  And you can leave more glaze in areas that you want to highlight...


after.

Doesn't it look great!!! Along with sweet Baby Samson... =)  I LOVE MY DOOR!! I need a new knob.. the brass just isn't cutting it.. and I'm also going to use my cricut to print "Panty" to put on the door as well.

So proud of my first antiquing project!!!!! Now onto my bathroom cabinets and antiquing the kitchen (dont worry, i'm not painting them green! hehe!)